
Your Services Page is one of the most important pages on your site. It’s where potential clients decide if you’re the right fit—and what action to take next.
This tutorial will show you how to update the layout and text on your Services Page using Elementor, plus give you a few writing tips to make your offers shine.
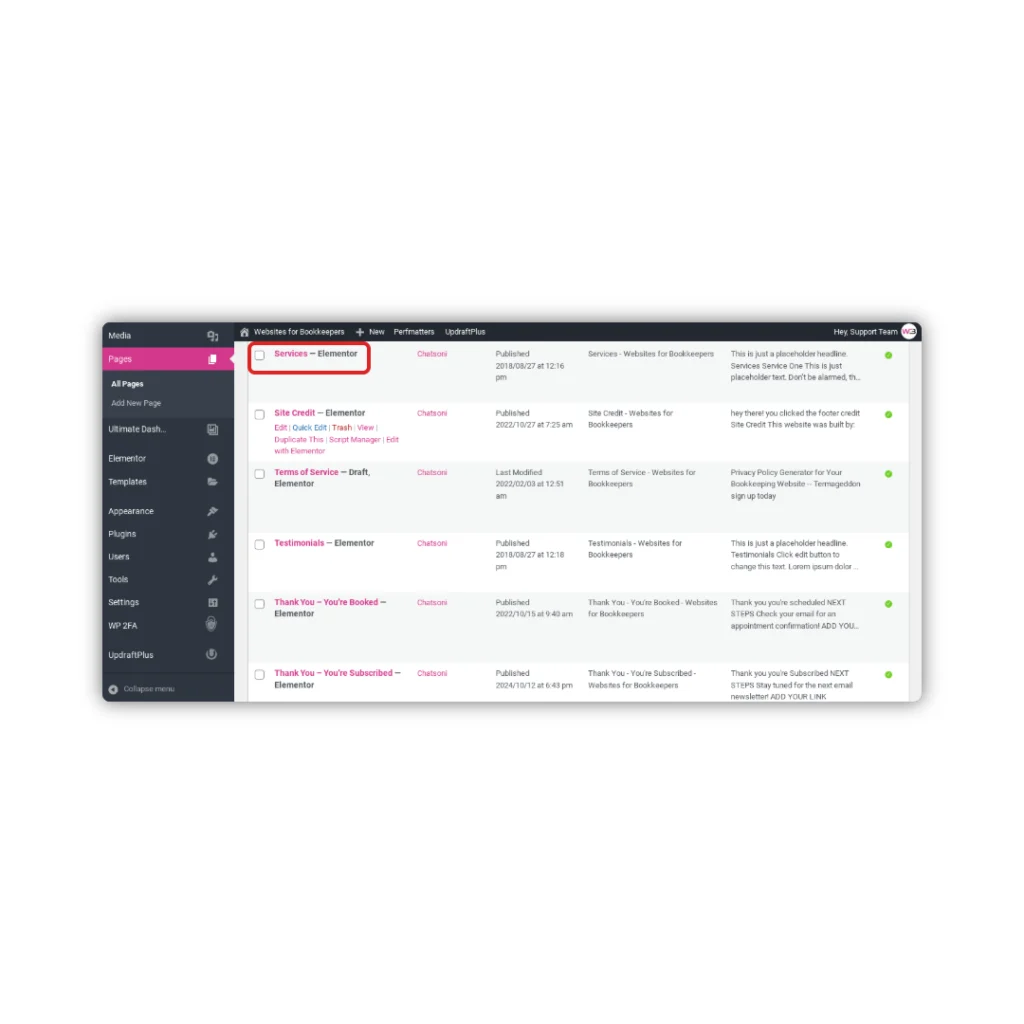
Step 1: Open the Services Page
- From your WordPress dashboard, go to Pages > Services
- Click Edit with Elementor
- The page will open in the visual editor, and you’ll be able to edit everything directly
Step 2: Update Your Headline and Intro
Start with a strong, simple headline that clearly states what you offer.
Examples:
- “Bookkeeping Services for Small Business Owners”
- “Virtual Bookkeeping Tailored to Your Needs”
- “Monthly Bookkeeping Plans That Save You Time and Stress”
Below your headline, use a short intro paragraph to explain who your services are for and the value you provide.
Prompt:
- “I help [type of client] with [solution] so they can [benefit].”
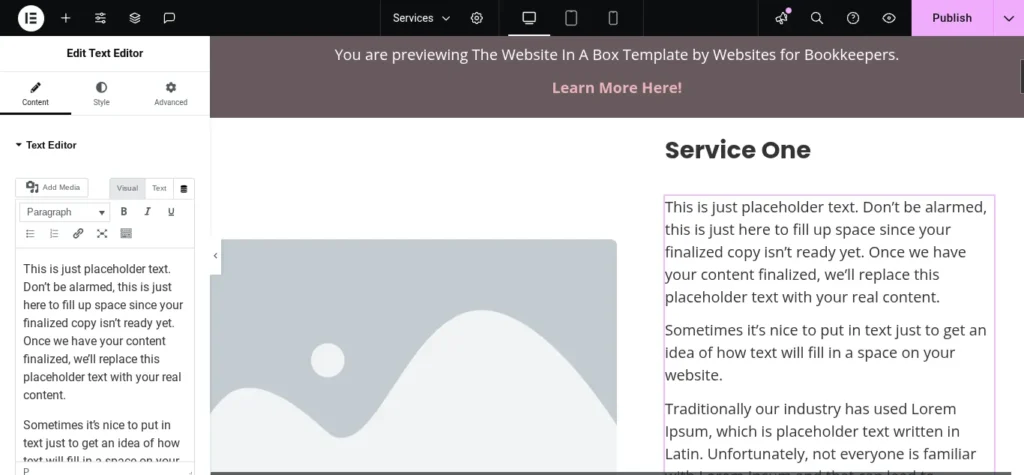
Step 3: Edit Each Service Section
Your template includes space for 3 service “blocks” (but you can easily add or remove these).
For each service block:
- Click the text to edit the Service Name, Description, and Price (if applicable)
- Keep it simple—focus on benefits, not jargon
- If you’re not ready to list pricing yet, use a CTA like “Book a discovery call for pricing.”
Writing Tip:
Use bullet points or bolded text to highlight what’s included. This makes it easier to scan and digest.
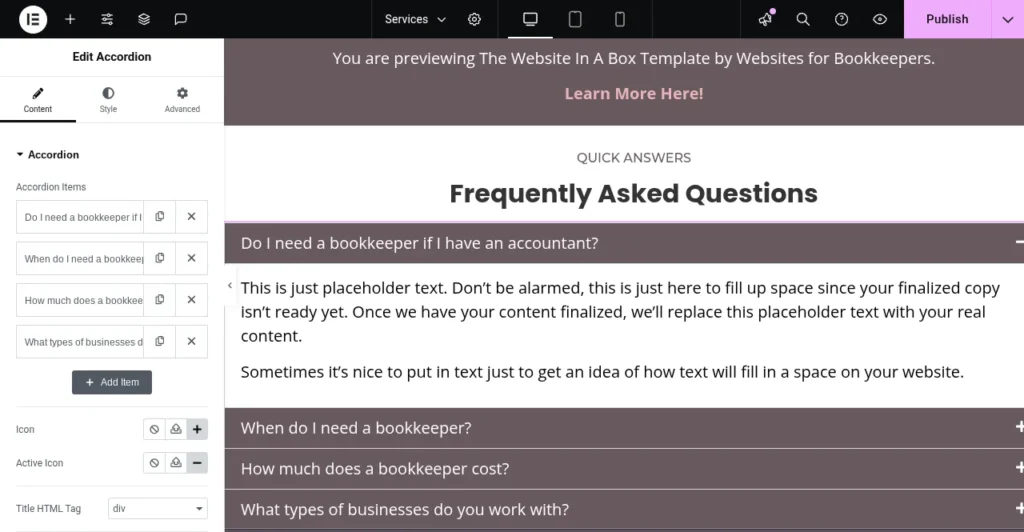
Step 4: Edit or Remove the FAQ Section
Your template may include a short FAQ accordion at the bottom of the page.
To edit:
- Click on the FAQ section
- In the left panel, click on each question to edit the text
- Add or remove FAQs as needed
Tip: Use FAQs to address common objections (e.g., “Do you work with QuickBooks?” or “Do I need to sign a contract?”)
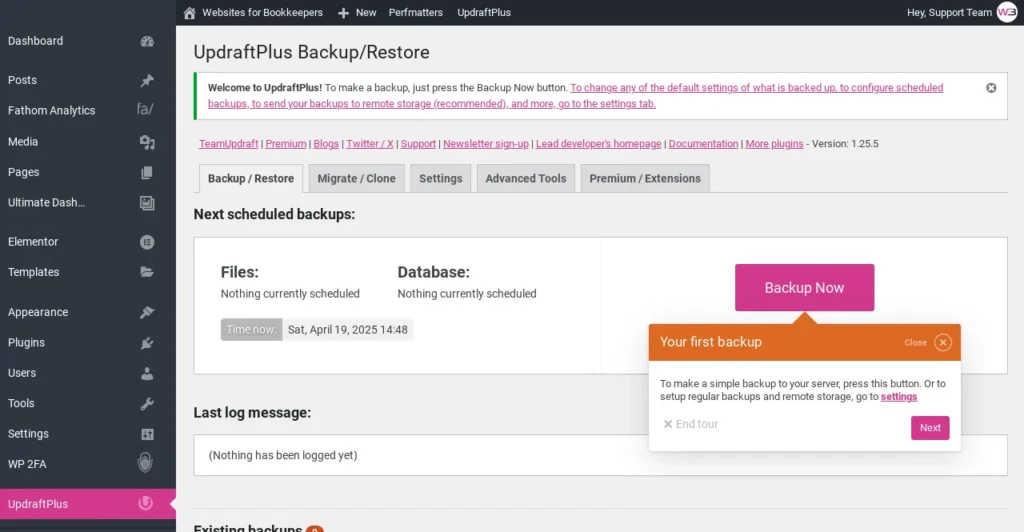
Step 6: Save Your Changes + Back Up
- Click Update in the bottom left of the Elementor editor to save
- Go to Settings > UpdraftPlus Backups
- Click Backup Now to create a restore point
Pro Tip: Keep It Clear, Not Cute
When writing your Services Page, clarity > cleverness. Your goal is to help visitors quickly understand:
- What you do
- Who it’s for
- Why it matters
- What to do next
Done and Done!
Your Services Page is now fully customized and ready to help visitors say, “Yes, this is exactly what I need.”
Next up: How to Customize Your Contact Page »
—or head back to the Help Center homepage to pick your next tutorial.