
If your scheduling tool supports custom redirect links, this Thank You page gives you a chance to make a warm impression after someone books a call—without relying on a generic message.
It’s already built into your site and includes:
- A friendly confirmation message
- An image placeholder
- A customizable call-to-action button
Step 1: Open the Thank You Page in Elementor
- In your WordPress dashboard, go to Pages > Thank You – Call Booked
- Click Edit with Elementor

Step 2: Customize the Message
Click on the headline and text block to update the content.
Use this space to:
- Thank them for booking a call
- Reassure them they’re in the right place
- Mention what to expect next (confirmation email, Zoom link, etc.)
Example Text:
Thanks for booking a discovery call!
I’m looking forward to learning more about your business. You’ll receive a confirmation email with the Zoom link shortly. In the meantime, feel free to check out some helpful resources below.
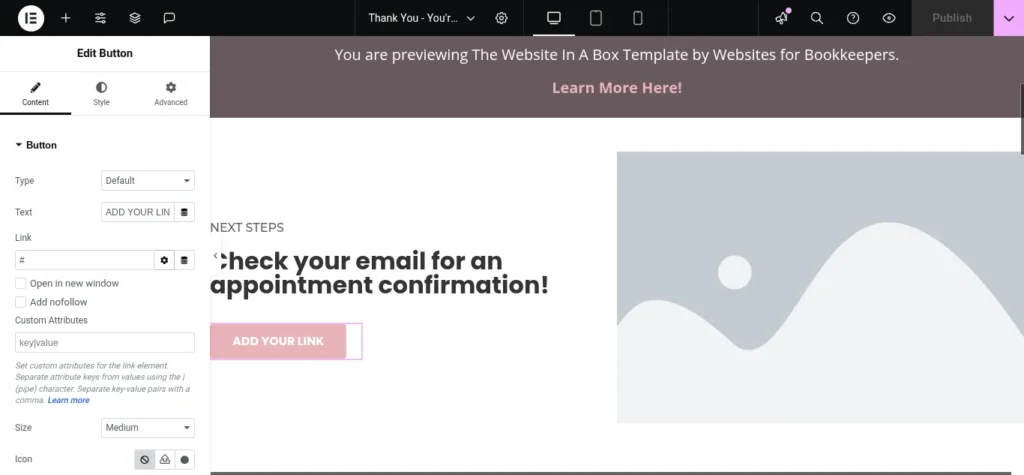
Step 3: Add or Swap the Image
There’s a placeholder image included (a fun brand photo, headshot, or illustration works great here).
To update:
- Click on the image
- In the left panel, click Choose Image
- Upload a new file or select from your media library
- Click Insert Media, then Update

Step 4: Edit the CTA Button
You can direct visitors to:
- A lead magnet
- Your portfolio
- A testimonials page
- A blog post or resource
To edit the button:
- Click the button block
- Update the text (e.g., “Download My Free Checklist”)
- Paste the link to the destination page in the Link field
- Click Update
Step 5: Add the Redirect URL to Your Scheduler
In your booking tool (Calendly, Acuity, Dubsado, or TidyCal):
- Go to the event settings
- Look for Post-Booking Redirect or Confirmation Page URL
- Paste your Thank You page URL (e.g.,
yourdomain.com/thank-you-call-booked) - Save the settings
You’re Done!
Your Thank You page is now welcoming, professional, and ready to guide your new leads to the next step—even before the call begins.