
The Resource Library page is a flexible, bonus section that lets you showcase all your offers in one place—perfect for clients who have:
- More than one lead magnet
- Free or paid digital products
- Helpful tools or guides they want to feature
This page includes:
- A section for each resource
- Headline
- Brief overview
- Image placeholder
- A call-to-action button (to download or purchase)
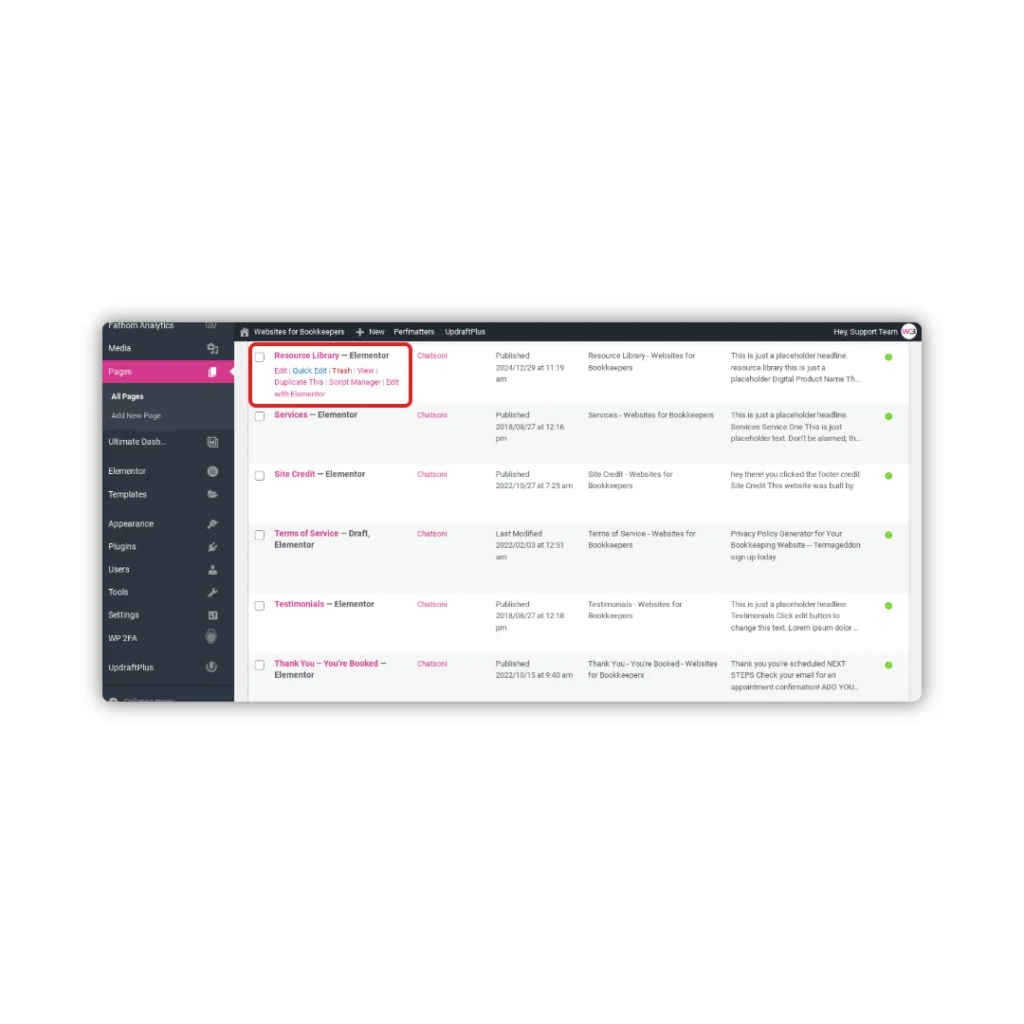
Step 1: Open the Resource Library Page in Elementor
- In your WordPress dashboard, go to Pages > Resource Library
- Click Edit with Elementor
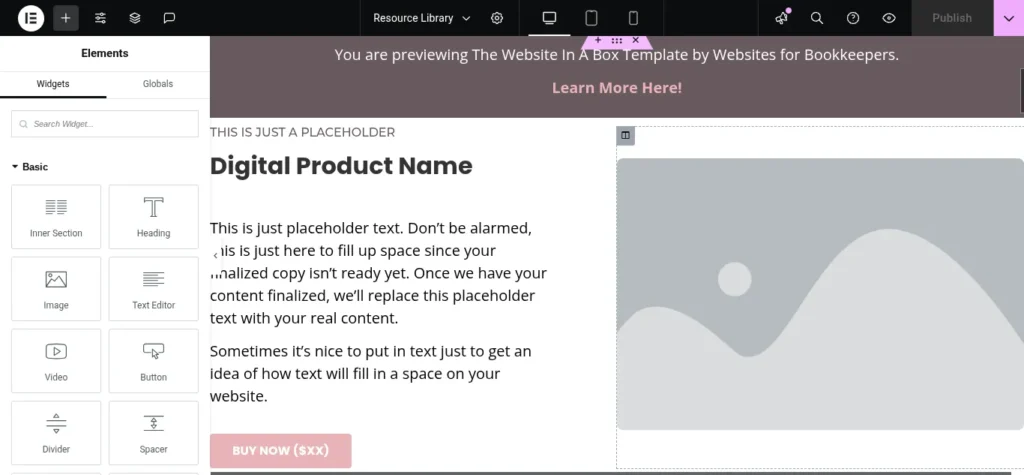
Step 2: Customize the First Resource Section
Each section is designed to highlight a single resource.
- Click the headline to name your freebie or product (e.g., “Website Launch Checklist”)
- Edit the overview paragraph to explain what it is and who it’s for
- Click the image to swap in a mockup, cover image, or branded photo
- Click the CTA button and update:
- Button text (“Download Now,” “Buy for $9,” “Get the Guide”)
- Link URL (Google Drive, Dropbox, product checkout, or landing page)
Repeat for each section you’d like to feature.
Step 3: Add or Remove Resources
To add more resources:
- Right-click on a section and click Duplicate
- Update the content for the new freebie or product
To remove a section:
- Right-click on the section and click Delete
Pro Tip: Group similar resources under subheadings like “Free Downloads” or “Digital Products” for better organization.
Step 4: Preview + Save
When you’re finished:
- Click Preview to see the full layout
- Make any adjustments
- Click Update to save
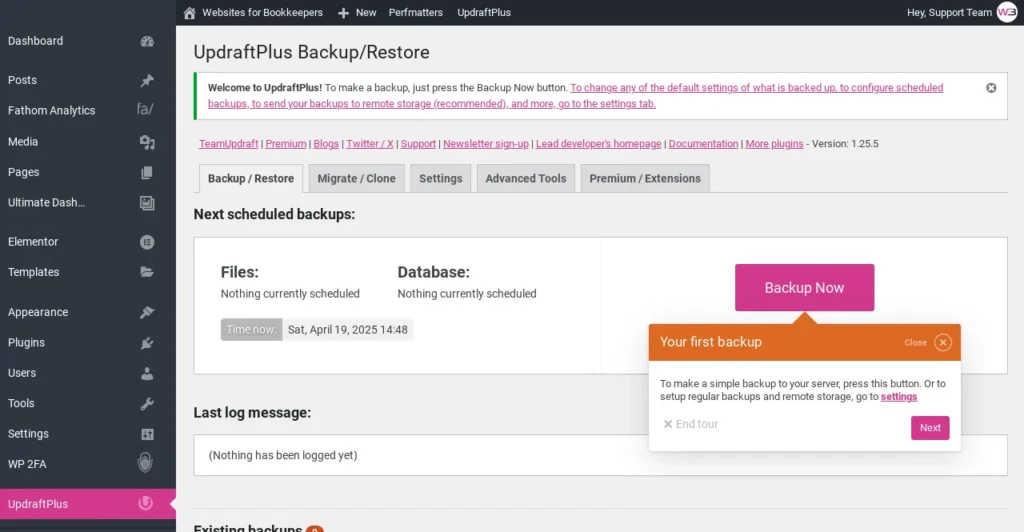
- Don’t forget to go to Settings > UpdraftPlus Backups > Backup Now just in case!
You’re Done!
Your Resource Library is now live and ready to serve as your digital hub—perfect for linking in your email newsletter, social bio, or homepage.