
Your legal pages may not be the flashiest part of your site, but they’re essential for protecting your business, building trust, and complying with privacy laws.
The good news? The hard part is already done. Your Privacy Policy, Terms & Conditions, Cookie Policy, and Disclaimer pages have already been created and saved as drafts—ready for you to personalize.
Step 1: Where to Find Your Legal Pages
- In your WordPress dashboard, go to Pages > All Pages
- Look for these drafts:
- Privacy Policy
- Terms & Conditions
- Cookie Policy
- Disclaimer (optional—depending on your business type)
- Click Edit with Elementor to open and customize any page
Step 2: Add Your Legal Policy From Termageddon
If you’ve signed up for Termageddon, you’ll receive embed codes for each policy.
To add them to your pages:
- Locate your embed codes (emailed by Termageddon)
- In Elementor, drag an HTML widget onto the page
- Paste the correct embed code (for Privacy, Terms, Cookie Policy, etc.)
- Click Update to save
Why Termageddon?
- Automatically updates your policies as laws change
- Covers GDPR, CCPA, and other privacy laws
- Keeps you compliant and professional
Step 3: Customize the Footer Menu (If Needed)
Your footer menu already includes links to all four legal policies.
If you only plan to use some of them, here’s how to remove any unused links:
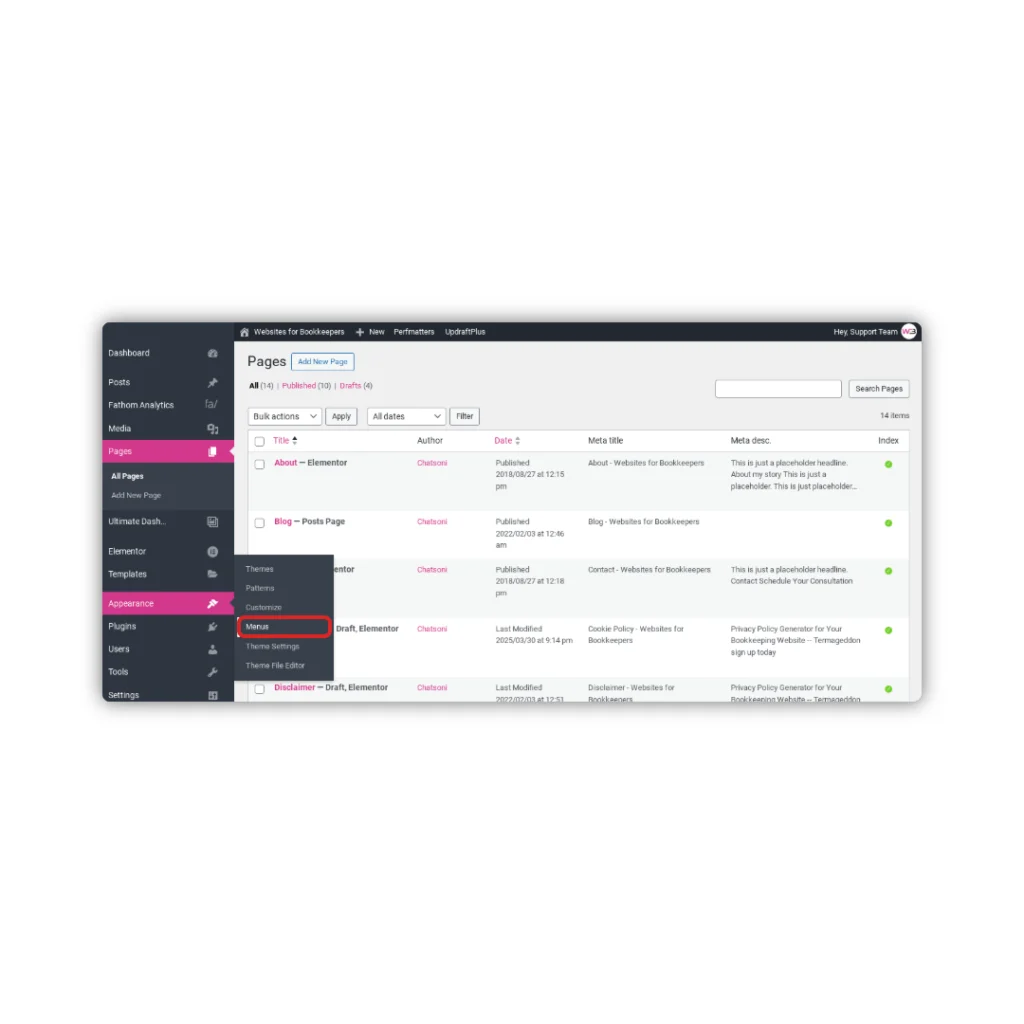
- In your WordPress dashboard, go to Appearance > Menus
- Find the menu labeled Footer Menu or similar
- Uncheck or delete any pages you don’t want to include (e.g., Cookie Policy or Disclaimer)
- Click Save Menu

That’s it! The footer menu will now reflect only the policies you’ve chosen to publish.
Step 4: Publish Your Legal Pages
Once your policy content or embed codes are in place:
- Return to Pages > All Pages
- Find each policy you’re using
- Use Quick Edit to change the Status from Draft to Published
- Click Update
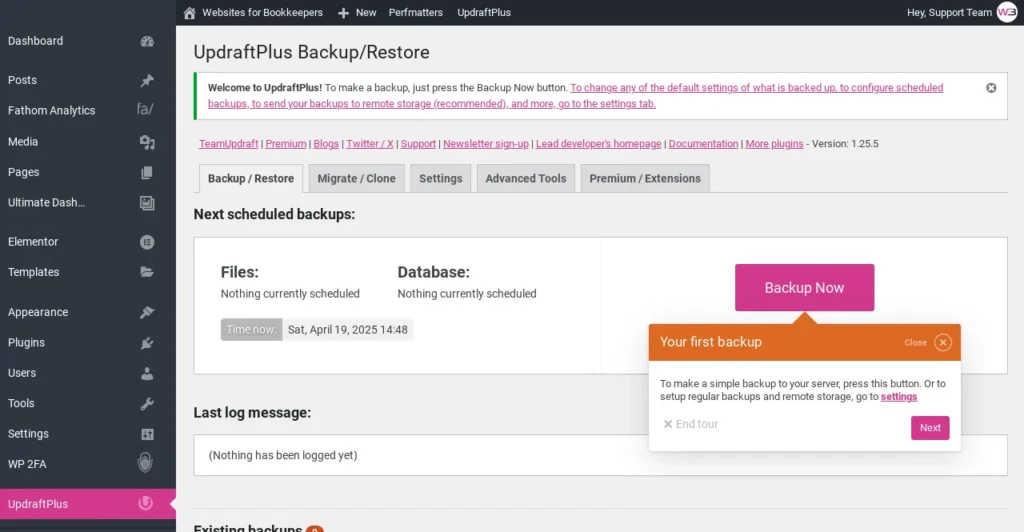
Step 5: Save a Backup
After everything is updated:
- Go to Settings > UpdraftPlus Backups
- Click Backup Now to save your changes
You’re All Set (And Legally Covered)
- Your legal pages are live
- Footer links are up-to-date
- Policies are embedded or customized
- Your site looks polished and professional
If you’re not using Termageddon yet, you can set it up in just a few clicks: Sign up here.»
Next up: Website Launch Checklist »
—or head back to the Help Center homepage to pick your next tutorial.