Website in a Box Template: How to Customize Your Contact Page

Your Contact Page is where visitors go when they’re ready to take the next step—so let’s make sure it’s clear, simple, and easy to use.

This tutorial walks you through how to customize your contact info, calendar, and optional contact form using Elementor.

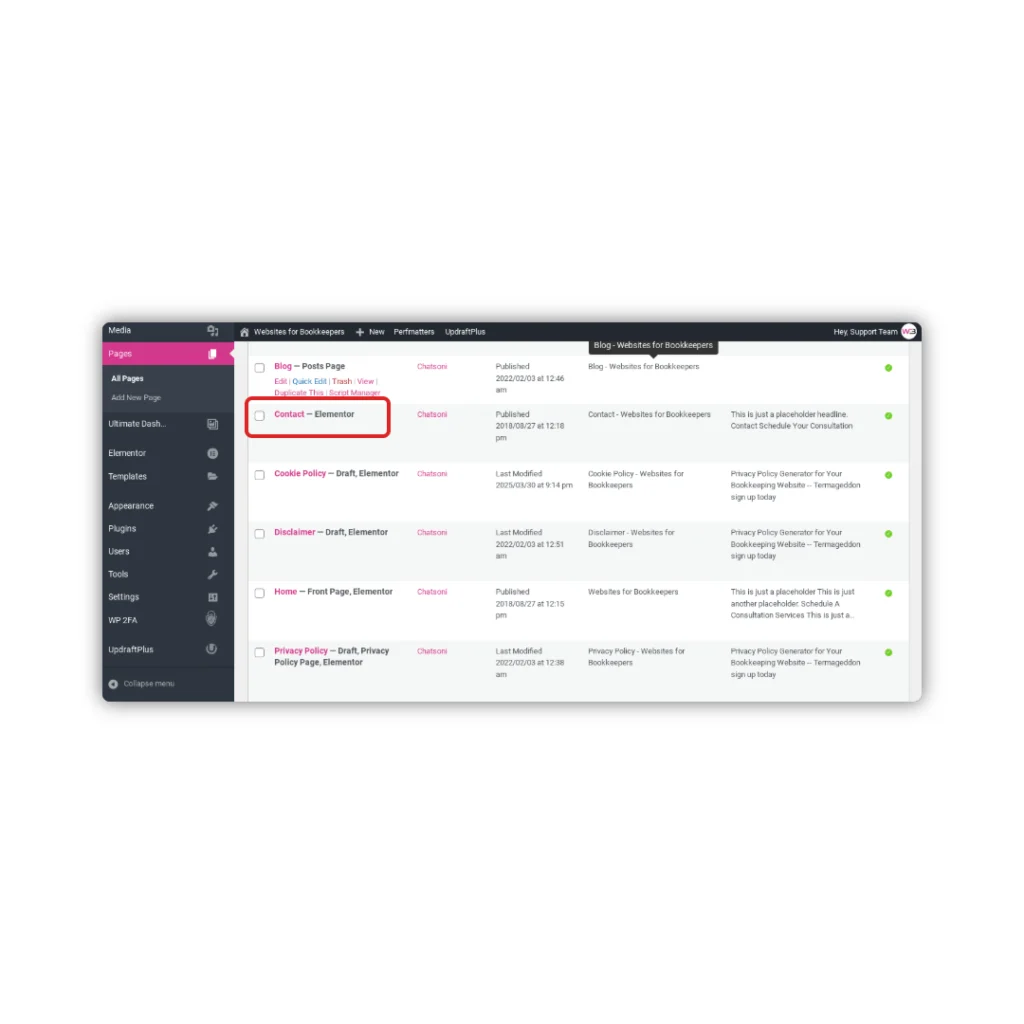
Step 1: Open the Contact Page

  1. In your WordPress dashboard, go to Pages > Contact
  2. Click Edit with Elementor

You’ll see a layout that includes your contact info, booking calendar (or placeholder), and possibly a simple form.

Contact page

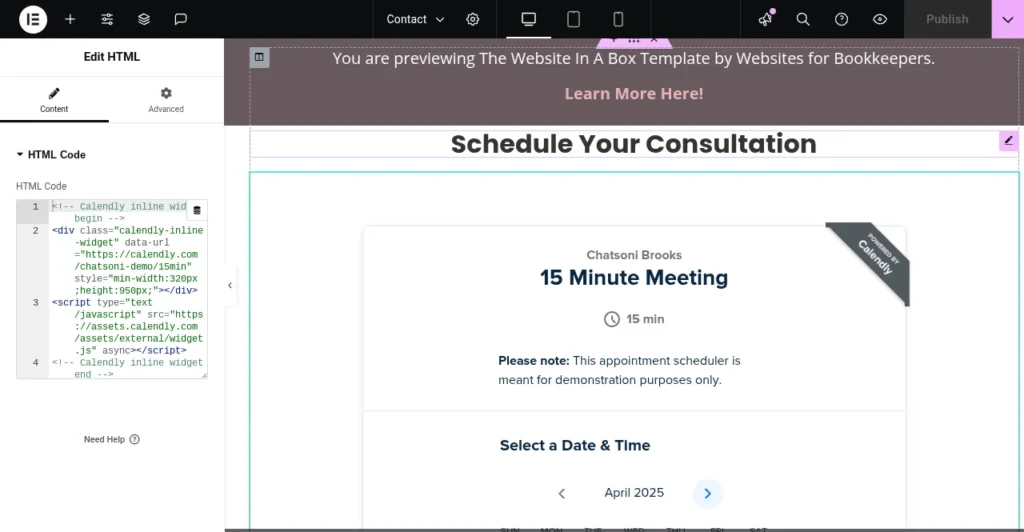
Step 2: Embed Your Booking Calendar

If you haven’t already embedded your calendar, follow the tutorial:
How to Embed Your Calendar on Your Website »

Once you have your embed code:

  1. Drag an HTML widget into the section labeled “Book a Call” or similar
  2. Paste your embed code into the left-hand panel
  3. Click Update to save
Edit embed

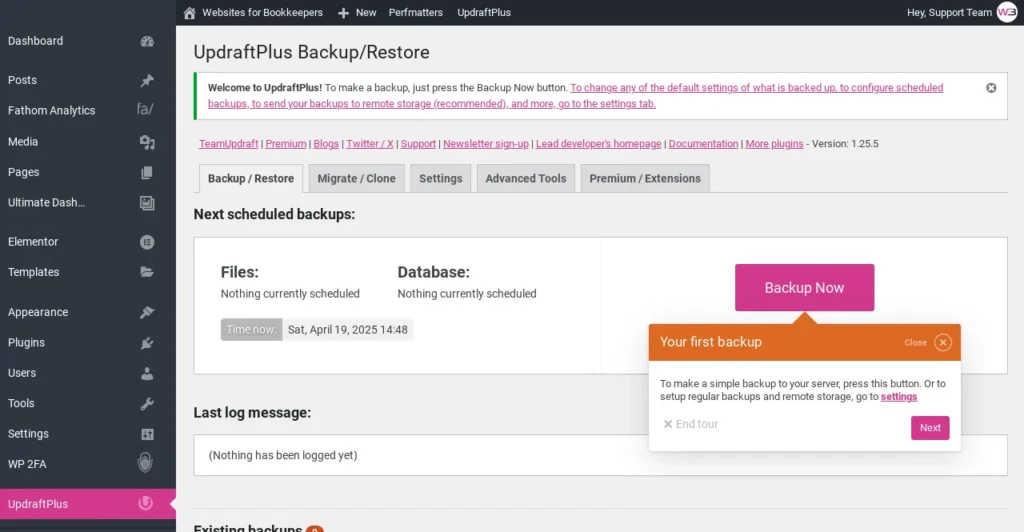
Step 3: Save a Backup

Once you’re happy with your changes:

  1. Click Update in Elementor
  2. Go to Settings > UpdraftPlus Backups
  3. Click Backup Now to save a restore point
Updraft backup

That’s It!

Your Contact Page is now live, polished, and ready to turn visitors into leads.

Next up: How to Customize Your Lead Magnet Page »
—or head back to the Help Center homepage to pick your next tutorial.

Related Posts:

Website in a Box Template: How to Set Up Stripe and PayPal for Selling Digital Products

If you’re ready to start selling digital products on your website, like the white-label digital products included in the Social Accountant membership, you’ll need to connect a payment processor to your e-commerce platform. This tutorial will walk you through: Stripe vs PayPal: Setup Before you sell anything, you’ll need to create accounts with one or both platforms. Create a Stripe

Read More »

Website in a Box Template: Website Launch Checklist

Final steps to review before you launch your Website in a Box You’ve customized your site, and you’re almost ready to go live. This checklist will help you confirm that everything looks polished, works properly, and is ready to be shared with potential clients. No need to aim for perfection—just make sure the essentials are covered. 1. Review All Pages

Read More »

Website in a Box Template: How to Customize Your Resource Library Page

The Resource Library page is a flexible, bonus section that lets you showcase all your offers in one place—perfect for clients who have: This page includes: Step 1: Open the Resource Library Page in Elementor Step 2: Customize the First Resource Section Each section is designed to highlight a single resource. Repeat for each section you’d like to feature. Step

Read More »

Find this post helpful? Subscribe to get the next article sent straight to your inbox!​

Share to...