
Blogging is a great way to:
- Share helpful tips with your audience
- Boost your website’s SEO (aka get found on Google)
- Build trust with potential clients
- Show your personality and expertise
This tutorial walks you through how to create and publish your first blog post, step by step.
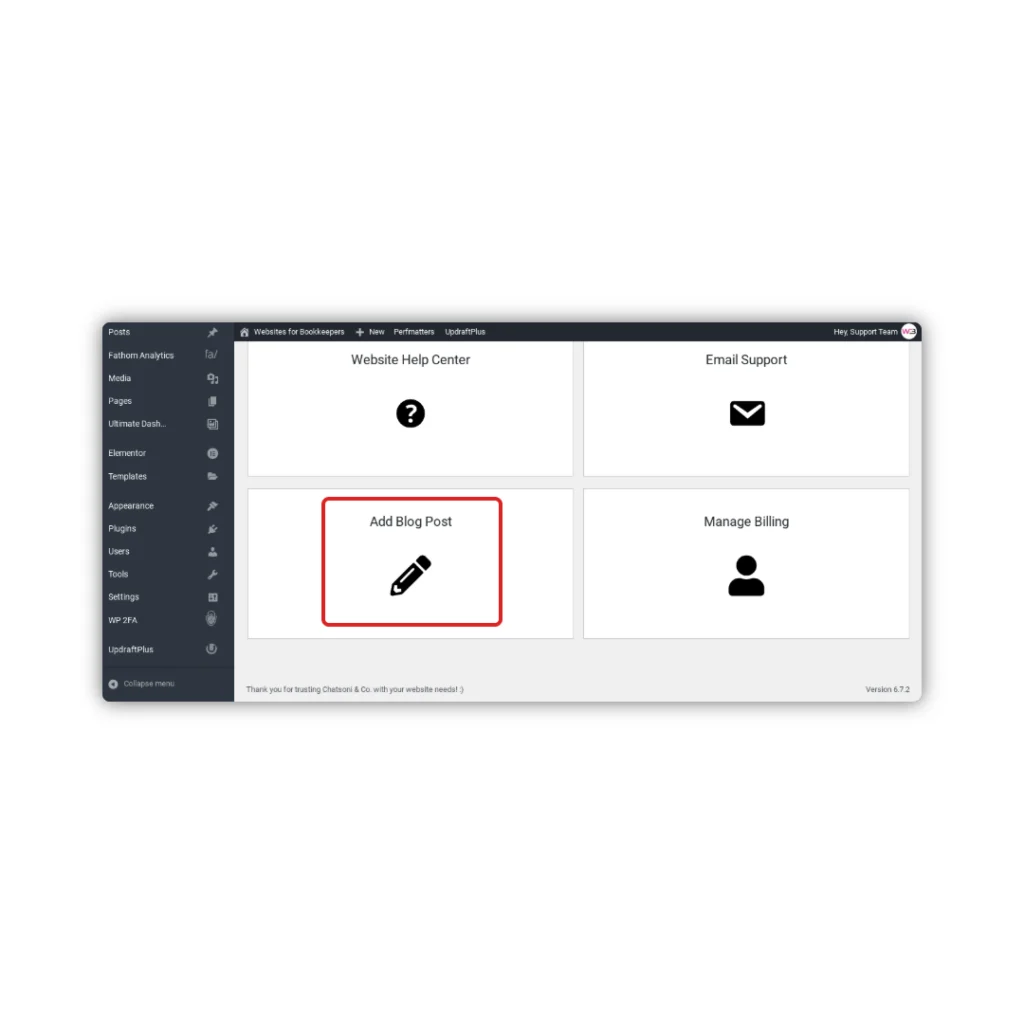
Step 1: Go to the Posts Section
- In your WordPress dashboard, go to Posts > Add New
- This will open the default WordPress block editor (called Gutenberg)
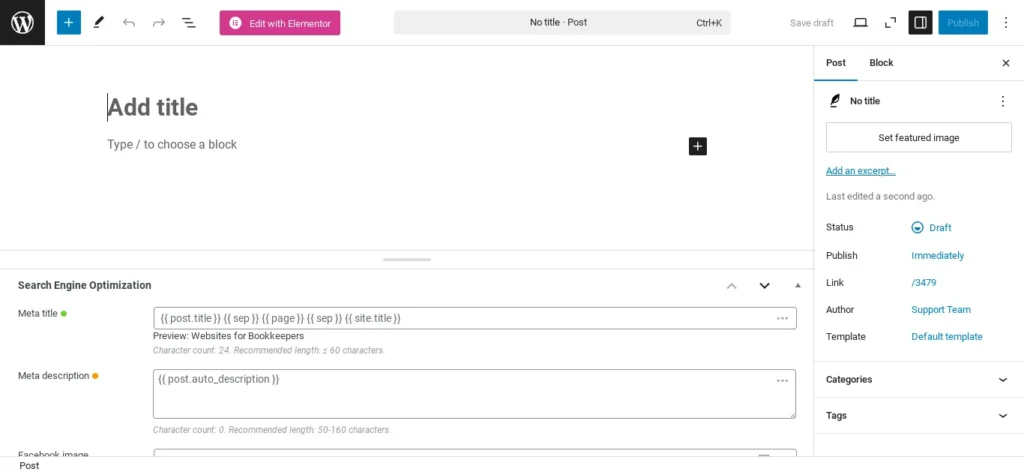
Step 2: Add Your Blog Title and Content
Start with a clear, helpful blog title.
Then, begin writing your content in the block editor just like you would in a Google Doc.
You can:
- Type text directly
- Add images
- Insert bullet points or headings
- Embed links to other pages or resources
Step 3: Format Your Post for Readability
Good formatting = easier to read and more engaging. Use:
- Headings (H2 or H3) to break up sections
- Short paragraphs (2–4 lines max)
- Bullet points or numbered lists when explaining steps
- Bold text to emphasize key ideas
Pro Tip:
If you’re not sure what to write, just think: What does my ideal client Google at 11 pm when they’re overwhelmed? That’s your blog content.
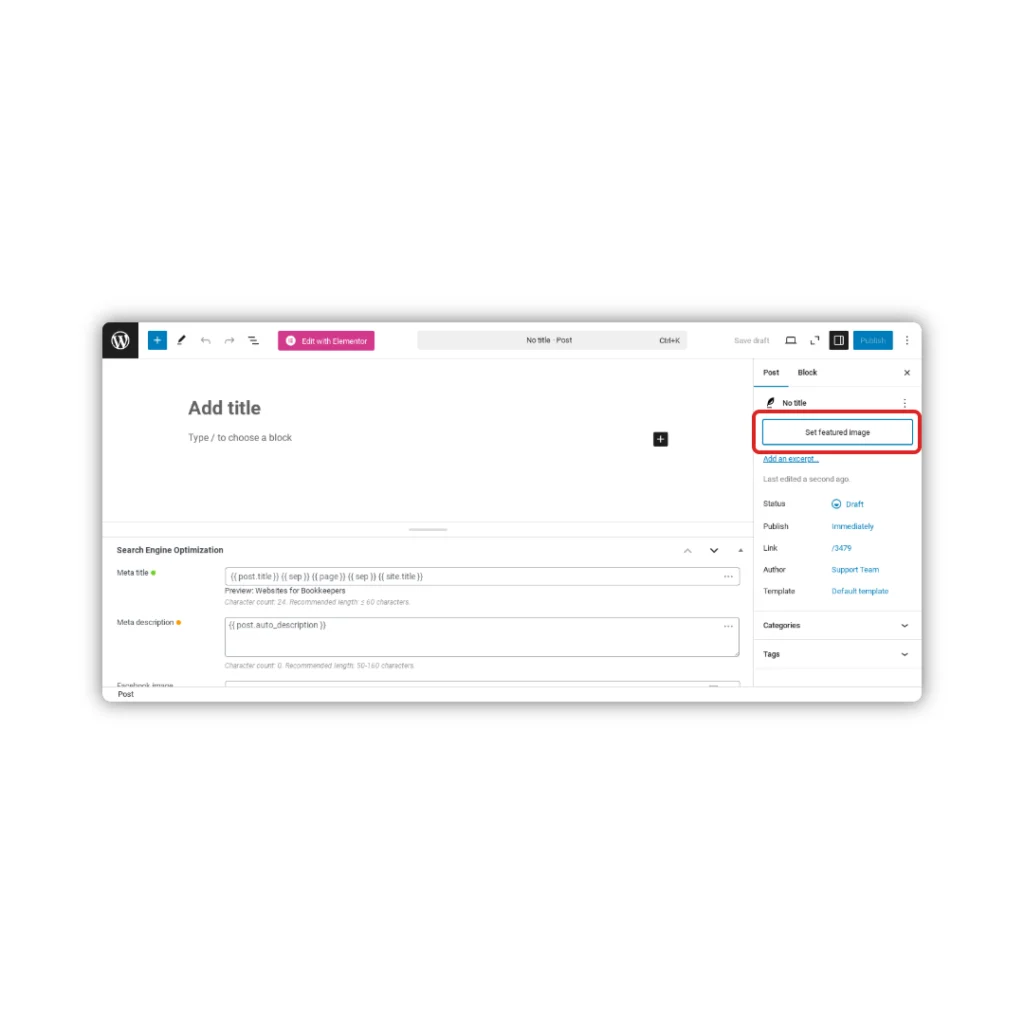
Step 4: Add a Featured Image
This is the image that will appear as the blog thumbnail across your site.
To add one:
- On the right sidebar, click Featured Image
- Upload a new image or select one from your Media Library
- Click Set Featured Image
Step 5: Assign a Category (Optional)
Categories help organize your blog, especially once you have multiple posts.
- In the right sidebar, open the Categories panel
- Check an existing category or click Add New Category
- Use broad themes like “Marketing,” “Website Tips,” or “Bookkeeping Advice”.
Step 6: Preview and Publish
When you’re ready:
- Click Preview to see how your post will look
- Make any final edits
- Click Publish and confirm
Your blog post is now live on your site!
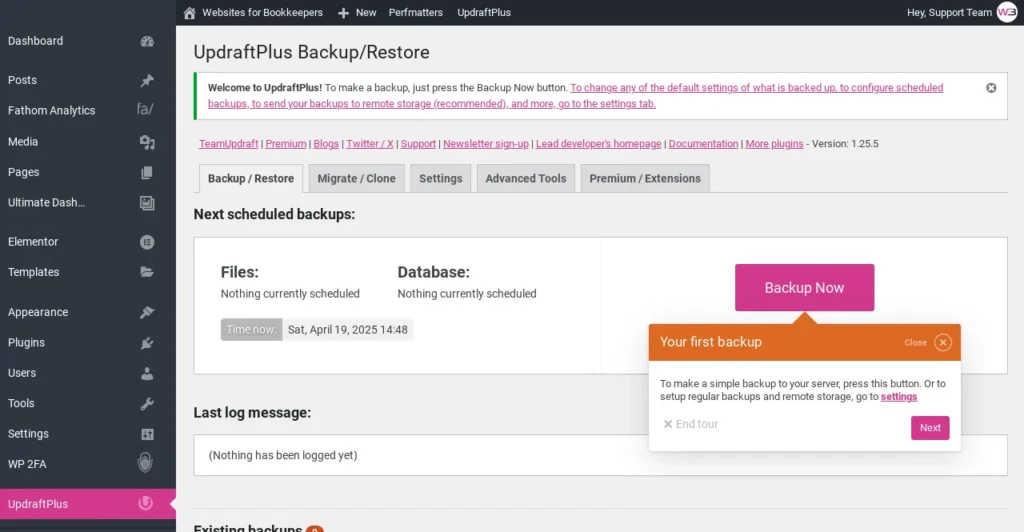
Step 7: Save a Backup
After you publish your post:
- Go to Settings > UpdraftPlus Backups
- Click Backup Now to save your updated content
Bonus: Where Your Blog Lives
Your blog posts automatically appear on your site’s Blog page (sometimes called “Resources” or “Articles” depending on your template).
To view it:
- Go to
yourdomain.com/blog - Or navigate to your Blog page from the main menu
Want to rename your blog page or adjust the layout? You can edit it just like any other page using Elementor > Theme Builder > Blog Archive.
You Did It!
You’ve officially published your first blog post. 🙌
Whether it’s one post or a library of helpful content, every blog you write helps your audience learn, trust, and take action.
Next up: How to Create or Edit Legal Pages (Privacy Policy, Terms, etc.) »
—or return to the Help Center homepage to pick another tutorial.