
How to add a new WordPress user

Do you need professional help with your WordPress website and want to invite your website designer/developer to log into your account without sharing your login credentials?

If so, you’re in the right place!

In this article, I’ll cover how to add a new WordPress user to your website account quickly and easily.

How to add a new user

  1. Log in to your WordPress website dashboard. This is the backend of your website.
  2. Once logged in, hover over the link Users on the left-hand navigation menu.
  3. From the Users dropdown menu, select Add New.
  4. From the Add New page, you will be able to invite a new user by creating a new username, entering a valid email address, generating a secure password, choosing a user role/level of access, and sending the new user a notification about their new account, so they know they have access.
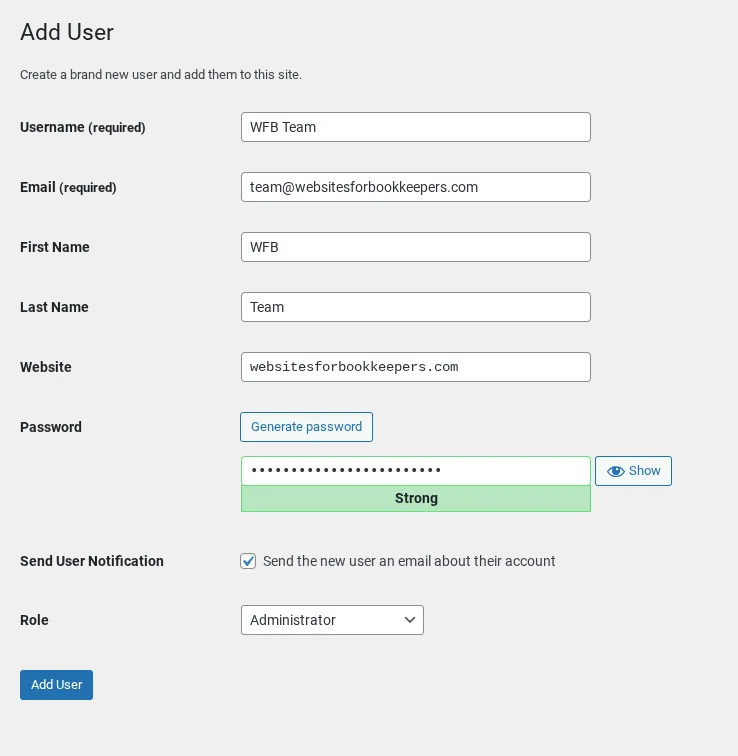
Screenshot [websitesforbookkeepers.com]

Please note: Your website developer will need Administrative access to your account in most cases. This is the level of access we require from clients.

Once your project is complete, you can easily remove their Administrative access by either changing their user role or deleting the user altogether.

We hope you found this information helpful!

Meet the Author:

Picture of Chatsoni Brooks

Chatsoni Brooks

Websites for Bookkeepers owner and website strategist sharing tips, tools, and resources to help bookkeepers fix—and avoid—the 3 reasons most websites fail.

Website in a Box Template: Website Launch Checklist

Final steps to review before you launch your Website in a Box You’ve customized your site, and you’re almost ready to go live. This checklist will help you confirm that everything looks polished, works properly, and is ready to be shared with potential clients. No need to aim for perfection—just make sure the essentials are covered. 1. Review All Pages

Read More »

Website in a Box Template: How to Customize Your Resource Library Page

The Resource Library page is a flexible, bonus section that lets you showcase all your offers in one place—perfect for clients who have: This page includes: Step 1: Open the Resource Library Page in Elementor Step 2: Customize the First Resource Section Each section is designed to highlight a single resource. Repeat for each section you’d like to feature. Step

Read More »

Website in a Box Template: How to Customize Your Legal Pages

Your legal pages may not be the flashiest part of your site, but they’re essential for protecting your business, building trust, and complying with privacy laws. The good news? The hard part is already done. Your Privacy Policy, Terms & Conditions, Cookie Policy, and Disclaimer pages have already been created and saved as drafts—ready for you to personalize. Step 1:

Read More »

Website in a Box Template: How to Create a Blog Post

Blogging is a great way to: This tutorial walks you through how to create and publish your first blog post, step by step. Step 1: Go to the Posts Section Step 2: Add Your Blog Title and Content Start with a clear, helpful blog title.Then, begin writing your content in the block editor just like you would in a Google

Read More »